Sugar skulls are often used to celebrate Day of the Dead, or Dia de los Muertes. This Sugar Skull bracelet is a perfect way to celebrate, too.

It’s fun and a little creepy. Easy to make, and appropriate for most ages. It’s even more fun to make this sugar skull bracelet with friends.
Day of the Dead is a Mexican holiday to celebrate loved ones that have passed. It’s generally a multi-day festival that is full of colorful decor, great food and festive Day of the Dead drinks, and so much more. They’re celebrating their loved ones awakening and celebrating with them. Sugar skulls are a major symbol of the holiday.
In recent years, Sugar Skulls have been co-opted for Halloween, or simply just trendy decor. I can understand why, as they are gorgeous, and still a little creepy. This Sugar Skull bracelet is easy to make, and your friends will never believe that you did it yourself.
You’ll even be making the sugar skull beads for this project. They’re made from polymer clay, which does take some skill to master. However, this is an easy project with amazing results that are truly satisfying.
Links may be commissioned.
How to Make Sugar Skull Beads
- White polymer clay
- Bits of orange and green polymer clay – or any two colors you want.
- Round wooden toothpicks
- Small faceted pointed back rhinestones
- Black acrylic paint
- Brown antiquing medium
- Needle tool
- Craft knife
- Paper towel
Sugar Skull Bead Directions
Break off a small piece of white polymer clay and roll it into a ball and flatten it. Pinch the jaw area to narrow it, leaving the head round. Think of a light bulb shape.
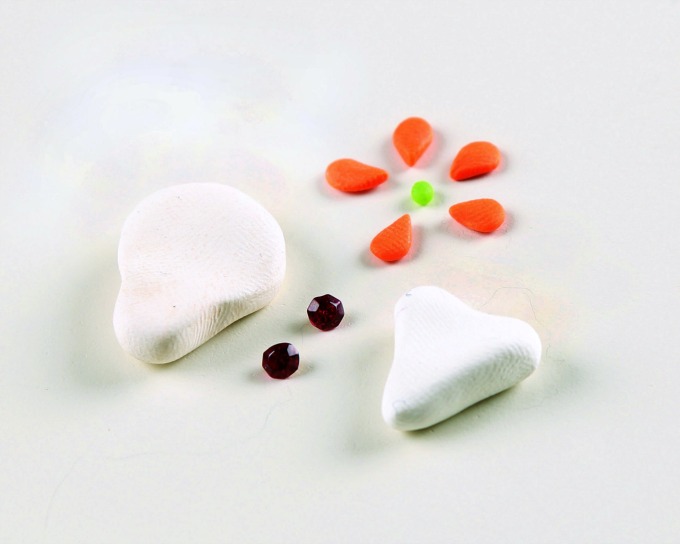
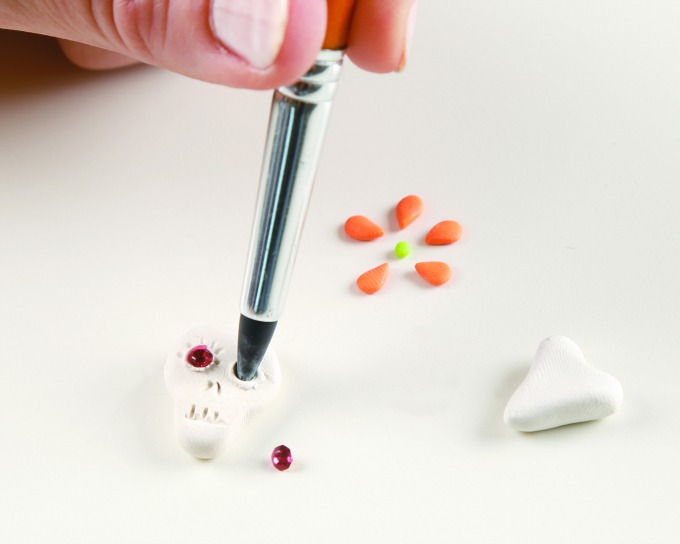
Using a rounded clay tool, form eye sockets on the skull. Pierce a hole in the center of each socket with a needle tool to mark placement for a faceted pointed back rhinestone for each eye. Push the pointed back rhinestones into the sockets. Use a craft knife or needle tool to add finishing details such as nostrils, teeth, and eyelashes.
Using the orange clay, form five small petals for a flower to place on the skull and the green clay to create a small ball for the flower’s center. Add the flower petals to the head and anchor them in place using the end of a needle tool. Press the small green ball of the clay into the center of the petals. Add details, if desired, using your polymer clay tool.
Make an accent bead as desired, such as a heart shape, bones, or anything you choose. You might also want to make four small beads with large holes to use as bracelet ends.
Make a hole through the bead, horizontally, approximately where the forehead temple would be. You can use your needle tool, or a toothpick for this. Bake the clay beads according to the directions on the package. Be sure to remove the toothpick before baking the beads.
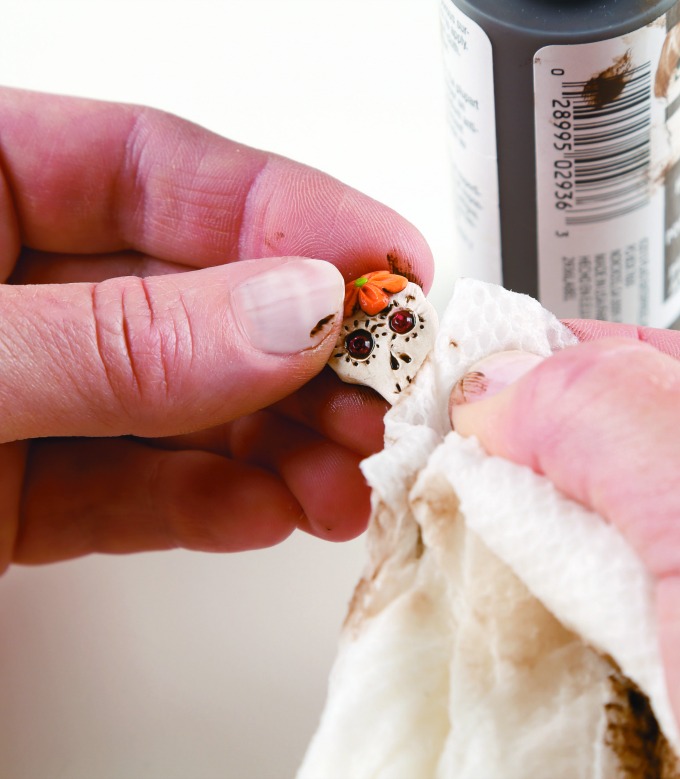
Mix black acrylic paint with brown antiquing medium to stain the recessed details of the beads. The gel helps to keep the paint moving into the crevices while rubbing off of the surface. The brown color of the gel imparts an antique look to the white color of the clay. Rub the paint/gel into the crevices. Wipe the surface of the baked sugar skull beads with a damp paper towel to remove the excess paint.
Making the Sugar Skull Bracelet
Bracelet Materials
- 4 yards (3.7 m) black nylon cord (cut 2 pieces 2 yards [1.8 m] each)
- Piece of fine wire for stringing
- Black faceted beads with large holes
- Thread melting tool. A lighter also works well.
- 8″ (20.5 cm) piece black curb chain
- 2 pair of pliers for attaching chain
Sugar Skull Bracelet Directions
Double both pieces of your nylon cord and attach a fine wire through both loops to thread through the beads. Thread faceted beads and the skull and heart beads, alternating each clay piece with faceted beads. Slide the beads to the center of the cords. After all of the beads are strung, cut the loop ends.
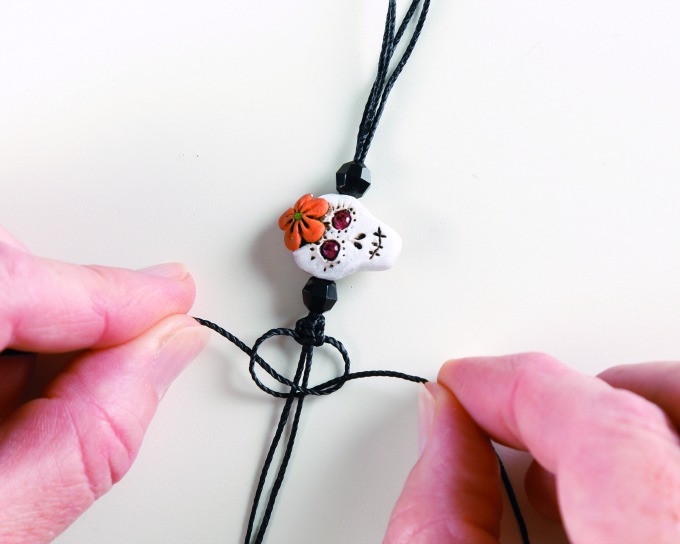
You’ll now have four cords. Pull the two center cords to the center to serve as a core. Use the other two outer cords to tie square knots around the center cords. Tie a series of square knots at each side of the beads to form the length of the bracelet. Continue knotting until the desired length is achieved.
Secure the end of the square knot pattern with an overhand knot on each side. Tie a sliding square knot closure over the ends of the cords. Add small clay beads to the ends of the cords to finish, securing with overhand knots. Use a thread melting tool, or a lighter, to seal the ends of the cord after cutting.
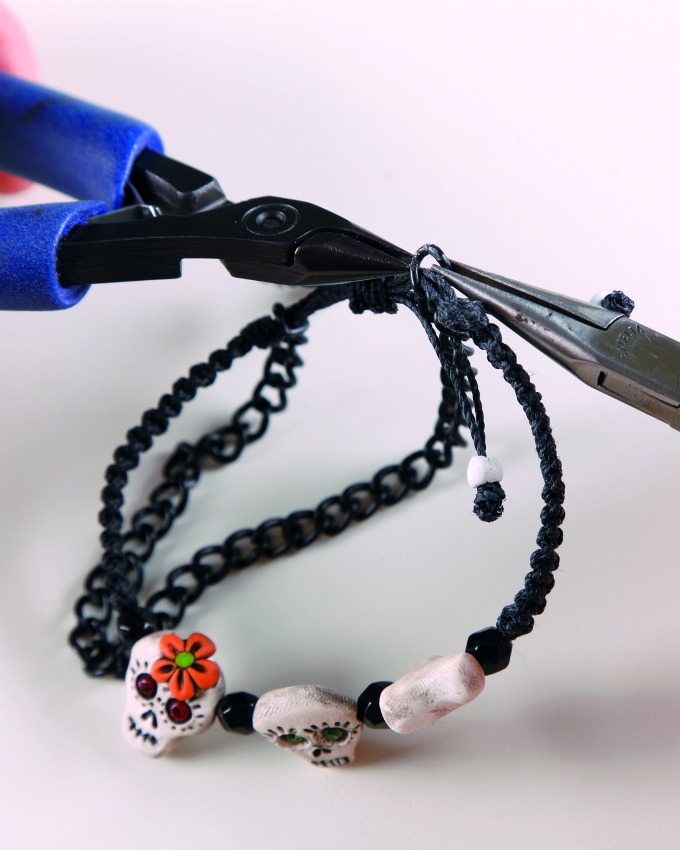
Measure a piece of black curb chain to match the length of the bracelet. Use pliers to open the end links of the chain and attach close to the overhand knots at each end of the bracelet.
See how easy that really is? It sounds like a lot of work, but once you get in the swing of making the beads, they’re really a lot of fun. You can probably make 6 bracelets from one 2 oz block of polymer clay, too.
Don’t forget to share on social, or pin to save this bracelet for later!

This is so nice! I love making jewelry! I am totally pinning this! 🙂
This is such a cute bracelet, thank you so much for sharing the how to! You make it look so easy!
This is so cute and you make it look so easy! I love it!
Oh how my grandchildren would love these. They are so cute. I think we will give these a try soon. Thank you so much for sharing
so cute. we love making stuff like this
I love the way this bracelet came out, super cute. I should try to make one for my granddaughter, she is so into skulls.
@tisonlyme143
This bracelet is seriously gorgeous! My daughter loves making bracelets so I’m going to share this with her.
Such a fun & creative craft. Thanks for sharing.
Thanks! My daughter loves crafting.
That makes a great bracelet. I love polymer clay.
This would be a fun teen activity for Halloween!